 What Is The Sphag And Bag Method?
The sphag and bag method is designed to improve the condition of an orchid’s roots.
When we talk about sphag, we are referring to the use of sphagnum moss (also known as peat moss) for horticultural purposes.
Due to the fact that sphagnum moss is acidic and good at absorbing moisture, it inhibits the growth of bacteria and fungi. By using sphagnum moss with your orchid and placing the plant inside a nearly sealed bag, you can help to remove excess moisture that is actually preventing plant roots from taking in water.
When Should You Use It?
The sphag and bag method should be used if you notice signs of rot or decay. It is even possible to use the sphag and bag method when there are no healthy roots remaining. Many people like to use the sphag and bag technique to make sure that any imports they receive are in a suitable growing condition. After all, better to be sure now than risk extensive care later
How to Use the Sphag and Bag Method for Re-Rooting
If you think that this sounds like something which would be useful for you, you will need to know how to do it. The process is quite simple, and you should find no problems with it if you are familiar with the basics of orchid care.
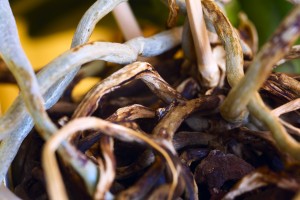
- The first thing to do is to carefully remove any unnecessary organic material from the roots. This includes any damaged or dead roots that may be present as they will inhibit the recovery of your orchid. Make sure to use a sterile blade when trimming the roots, to prevent the introduction of any possible infections or pollutants.
- Soak the plant for about one hour in a gallon of warm water. Some people choose to add a tablespoon of root stimulant, but this is optional. You may find that this helps to dislodge any organic matter that you were unable to remove during the first step. Again, use a sterilized blade.
- Get a clear plastic bag. There are many companies which sell bags which have been designed with the sphag and bag method in mind. You may choose to buy one of these. If not, just make sure that the bag you are using is clear, free from any holes and can be sealed in some way.
- Take a small amount of sphagnum moss and place it in the corner of the bag. Make sure to give the moss a little moisture, about a teaspoon. This will help the bag stay humid and will provide ideal growing conditions for your recovering orchid. The humid environment means that your plant can dedicate resources to re-growing its roots, rather than focusing on its surface features.
- Put your orchid inside the bag. Place it such a way so that it is still growing in its natural direction. A common mistake at this point for many people is to place it in contact with the sphagnum moss. As we have discussed above, sphagnum moss is very absorbent and will quickly strip your orchid of the water it so desperately needs. Do not make its job harder for it. Similarly, make sure that it is not in contact with any water inside the bag. Again, you are trying to clear the roots of their excess moisture and this will hinder the process.
- Seal the bag while allowing for some air movement. If you have bought your bag from a gardening store, then such bags tend to come with a Ziploc seal, making this step simple. Anyone using their own bag should either fold the bag over at the top a few times, before sealing it with a bulldog clip or similar. Alternatively, you can bunch the bag up and fasten in at the top using an elastic band. The aim is to prevent excess moisture or pollutants entering the bag. You are trying to control the humidity so make sure the bag is secure. (You don’t want it to be completely air tight because you’ll get mold. Make sure there is room for air movement and the bag is not sealed off completely.)
- The final step is to position the plant in a warm, shaded area. It is important for the humidity to remain at an acceptable level for a number of weeks to allow the roots to grow. A shady space will provide enough light for the plant to grow, without causing the inside of the bag to turn into a tropical climate. The warmth allows the moisture to circulate around the bag and encourages cell development within the orchid.
After a few weeks (or even a month) have passed, you should notice that the roots of your orchid have returned to a healthy state. Be patient with the process and repot the orchid when the root system has properly developed. A good idea is to simply leave your plant in its cozy location and try to put it out of your mind. Check in on it once a week to make sure that the bag is still secure.
If the bag is causing you problems with mold, you can try using two plastic pots. Put the moist sphagnum moss in the bottom of the first pot and then put the orchid into the second pot. Put the second pot inside of the first pot (on top of the sphagnum moss). You want the first pot to have taller edges to allow for humidity to occur inside that pot area. This method can work really nicely as well if the bag isn’t working for you.
Have you used this method before? What were your results? Has anyone modified this to have better success? We’d love to hear about it. Leave us a comment below and tell us about it.
Are you unsure about the health of your orchid? Here are ways to tell if your orchid is sick.


Hi…I’m trying this method. One with the Ziploc and one with two containers. Does the container with the orchid need to have a hole in the bottom? Also, how often should I re-dampen the moss. One more question… Someone told me it’s OK to leave the dry, dead roots for stability. Is that true? Thx for any advice!
Hi – Here is a video that I think would be very helpful to you: https://www.youtube.com/watch?v=NumaqpuSo6E I would remove dead roots and check it once a week to see how the moss is doing and if it needs to be re-dampened. I hope this is helpful! 🙂 – Mary Ann
Would like a printable copy of this, please.
Thank you.
Hi Barbara, You are able to print this. When on the page, just go to file – print. 🙂 Thank you so much! – Mary Ann
This works! I bought a rootless dendrobium for a dollar. It took two months, but l’ve got roots starting to grow.
That’s awesome! Thank you for sharing!! It definitely takes patience. Did you use a bag or did you use the modified method with no bag? – Mary Ann
For 5 months, my two leafs orchid was very dehydrated, and only grew a tiny papery leaf from a very dry brown stalk. Three very dry thin roots also grow out of this brown stalk. The other leaf, though larger was wrinkled and papery thin. Its bottom half was yellow.
Last two weeks,
Every morning I soak the orchid with a weak fertilizer water solution for 5 minutes. Then I perch it on a stick in a empty plastic pot. I place all this into a plastic bag and mist the inside before sealing and placing by a east facing window.
Nights, I allow the orchid to dry out. I remove the orchid from the bag and dry any moisture in the orchid’s crown.
Results – the small new leave has tripled in size. The larger dried yellow leave is greener and plumper. A new leaf is growing- 3 leafs now!
Tiny roots are developing on the green parts of the stem.
This is awesome! Thank you for sharing! 🙂 Patience and consistency are key with orchids. – Mary Ann
Okay so i currently did this and i also added marbles so i can put a stuck and twist tie orchid onto stick. That way it down not touch the moss it hangs above. I put a little bit of water as well. My question is when i leave it in the bag… do i have to ever add more water to it? Or take off the bag once in awhile? I struggled with root rot and im afriad to hzve it go back.
Hi Jamie-Lynn, Thanks for your question. If you are worried about root rot, I would take a look at this video. It might be a better solution for you. 🙂 – Mary Ann